
Menu Board Kitchen Design Tips for Efficient Commercial Food Prep

Want a kitchen menu board that actually works for your life, not just another decorative piece? A well-chosen menu board clarifies meals, cuts decision time, and keeps your kitchen running smoothly every week.
You’ll learn simple types of menu boards, how to match one to your décor, and practical ways to use it so it becomes the hub for meal planning, shopping lists and family coordination. The right menu board turns chaos into a quick glance solution you’ll rely on daily. When you’re ready to upgrade, The sign company UK offers a wide range of menu boards to suit any kitchen or commercial space.
Key Takeaways
Choose a menu board style that fits your space and how you plan meals.
Integrate menu boards into your kitchen layout to boost usability.
Use menu boards for planning, lists and routines to save time and reduce stress.
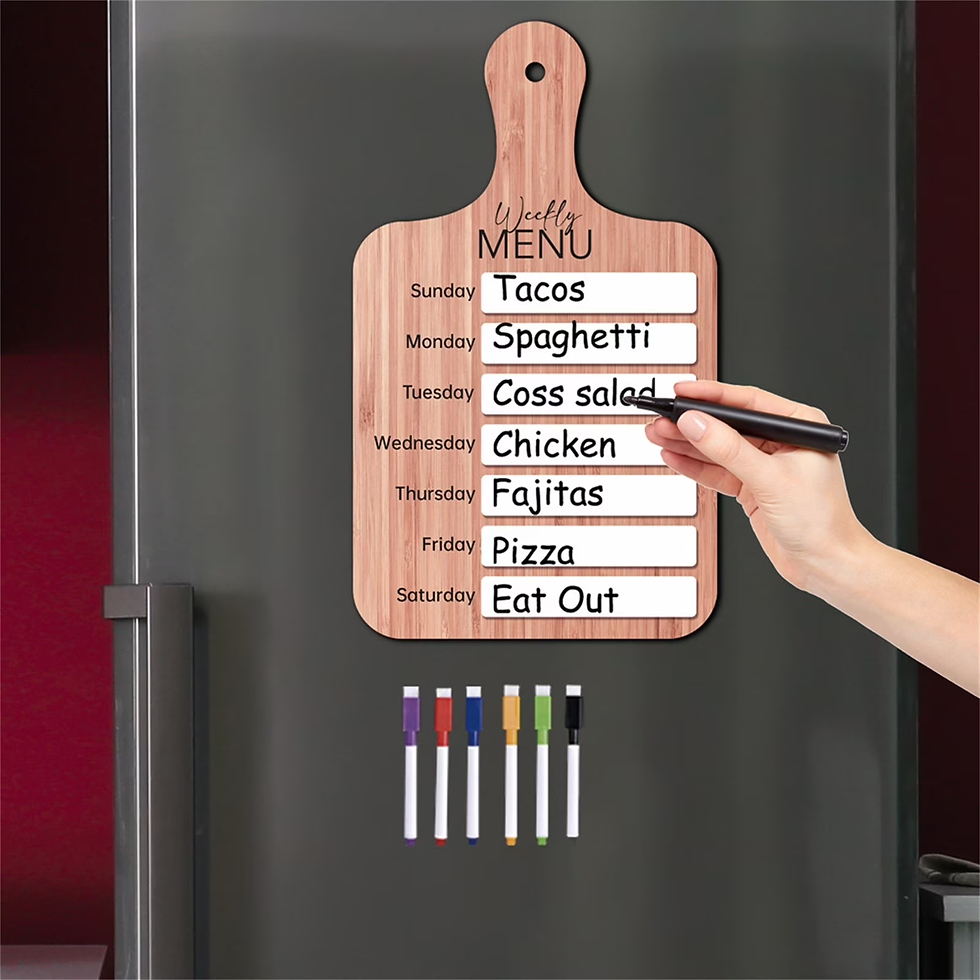
Types of Kitchen Menu Boards
Choose a menu board that matches your space, how often you change items, and whether you want a hands-on or tech-driven solution. Consider durability, legibility, and installation needs when deciding between traditional, magnetic, or digital menu boards. The sign company UK can help you select the ideal menu boards for your needs.
Chalkboard Designs
Chalkboard menu boards offer tactile control and a classic visual style that suits cafes and home kitchens. You can buy framed slate, painted MDF, or removable chalkboard vinyl. Slate gives a premium, scratch-resistant surface; painted MDF is lighter and cheaper; vinyl sticks to surfaces and rolls up for storage.
Maintain legibility by using thick chalk markers or wet-wipe chalk for cleaner lines. Use grids or stencils to align prices and meal names. Protect finishes with a matt lacquer if you expect heavy wiping, and reseal natural slate annually to prevent staining.
Mounting options include wall-hung frames, easel stands, or inset cabinetry panels. Consider glare from overhead lighting—position the menu board where reflections won’t obscure handwriting. For frequent changes, place the menu board within arm’s reach of your prep area.
Magnetic Boards
Magnetic menu boards provide quick rearrangement and strong durability for kitchens with fluctuating menus. You can use enamel steel, magnetic whiteboard, or stainless steel with magnetic paint. Enamel resists staining and holds magnets well; whiteboards are bright and writable; stainless suits modern or industrial designs.
Use magnetic labels, number tiles, and stock magnets to move dishes and mark specials. Combine printed magnetic strips for logos with handwritten notes for daily changes. Clean with non-abrasive cleaners to avoid ghosting and keep your menu board looking sharp.
Installation ranges from adhesive mounting for lightweight panels to anchored wall fixings for heavy enamel sheets. If you plan to attach utensils or recipe cards, choose a menu board rated for heavier magnets. Think about heat exposure—place away from direct oven heat to prevent warping.
Digital Solutions
Digital menu boards suit kitchens that need rapid updates and multimedia display capabilities. Options include single-screen tablets, multi-screen LED arrays, or cloud-connected smart displays. Tablets work for small menus and touchscreen order entry; commercial-grade LED panels handle high-visibility, full-colour graphics.
Use scheduling software to rotate menus by time of day, update prices remotely, and display allergen icons or nutritional info. Integrate with POS systems for real-time item availability and automated daily specials. Choose software with simple templates if you lack design experience.
Consider hardware placement, ventilation, and secure mounting to avoid heat and splatter. For commercial kitchens, select IP-rated screens for moisture resistance. The sign company UK can advise on the best digital menu boards for your layout and budget.

Incorporating Menu Boards Into Home Décor
Menu boards can serve as a functional focal point, display practical information, and reinforce your kitchen’s style. Place menu boards where they’re easy to read and update, choose materials that match existing finishes, and add accessories that enhance usability.
Style and Placement Ideas
Choose a menu board size that fits the wall and viewing distance: 60–90 cm wide works well above breakfast nooks; 30–45 cm suits pantry doors or fridge sides. Mount at eye level—about 150 cm from floor to centre—for easy reading while standing.For style, match materials: chalkboards pair with rustic or farmhouse kitchens; black acrylic or matte metal suits industrial schemes; framed whiteboards fit contemporary, minimal spaces.
Use grouping for visual impact: a large single menu board above a console, or a trio of slim menu boards in a row near the cooking zone. Consider lighting—adjustable wall lights or a narrow LED strip above the menu board improves legibility without harsh glare. Keep proximity practical: within 1–2 metres of prep areas for quick reference, and away from direct stove heat or splashes to prevent damage.
Customisation Options
Select writing surfaces based on how often you’ll update content: chalk or liquid chalk for frequent daily changes; magnetic dry‑wipe for menus and lists you tweak weekly. Choose colours that contrast with wall paint—white on dark paints, or deep slate on light walls—to ensure readability from a distance.Personalise headings and sections with stencils, vinyl lettering, or laser‑cut acrylic tabs to standardise layout for meal plans, shopping lists, and recipes.
Add modular frames or interchangeable panels to switch between seasonal menus and daily lists. Include built‑in storage options like a slim tray for markers, chalk, erasers, or magnetic clips for receipts and coupons. Consider weatherproof finishes if you plan to place the menu board in a glazed conservatory or semi‑outdoor kitchen.
Complementary Accessories
Install a small shelf or lip beneath the menu board to hold pens, chalk and a cloth; aim for 5–10 cm depth so items stay put. Magnetic strips or a cork strip mounted to the side provide places for receipts, menus and recipe cards without cluttering the menu board surface.Use labelled jars or a wall‑mounted caddy for cleaning supplies and replacement markers. Choose clips or magnets with strong grip—neodymium magnets for thin metal menu boards, spring clips for thicker frames.
For mixed‑media menu boards, add a narrow LED task light with adjustable colour temperature to keep writing visible under different daylight conditions. If you use vinyl labels or stencils, keep a roll of extra vinyl and a craft knife nearby for quick repairs or updates.

Functionality and Organisation Benefits
A menu board streamlines how you plan meals, coordinate family routines and track perishables. It provides visible structure so everyone knows what’s for dinner, who cooks, and which items need using soon.
Meal Planning Efficiency
A menu board lets you plan dinners for the week at a glance, reducing last-minute decisions. Write meals by day and note key ingredients next to each dish so you can cross-check with your shopping list quickly. Use a colour code for protein, starch and vegetables to speed visual scanning and prevent repeating similar dishes.
Block out prep and cook times beside meals to balance busy nights and allocate cooking responsibilities. Update the menu board after grocery runs so your plan matches what’s in the pantry. If you follow specific diets, list substitutions on the menu board to adapt meals without stopping to search recipes.
Family Communication
Place the menu boards in a high-traffic spots so everyone sees it daily and knows expectations. Add a column for who’s cooking and one for special notes (allergies, guests, or leftovers to bring) to avoid misunderstandings. Encourage family members to tick off completed meals or propose swaps directly on the menu board.
Use simple symbols or initials to indicate tasks and ownership; this reduces text and speeds comprehension. Keep a small marker holder and an eraser nearby so updates happen in seconds, not minutes, making the menu board a living tool rather than a static poster.
For tailored menu boards and expert advice on kitchen signage, contact The sign company UK to enhance your kitchen’s efficiency and style.
For a complete approach to menu communication, explore our guides on Menu Boards Design for customer-facing display best practices and Menu Boards for Food Trucks for space-efficient solutions tailored to mobile food businesses.
Reducing Food Waste
List perishable items with use-by reminders on the menu boards from The sign company UK to ensure they feature in upcoming meals. Create a “use-up” row on the menu boards for ingredients approaching their expiry and assign them to specific weekday meals to prevent spoilage. When you plan around what you already have, you cut unnecessary purchases and avoid duplicate items.
Track leftovers by writing portion counts and suggested reuse (e.g. “3 roast chicken portions → soup Tue”) directly on the menu boards from The sign company UK. This habit lowers food waste and saves money while keeping meal planning realistic and anchored to actual supplies.



Comments